Easy Tile 2D - Pygame tool & Tile Map/UI Asset Creation
A downloadable tool for Windows
# Easy-Tile-2D - User friendly Pygame Map Maker & UI Creator
WIKI and more information on Github,
Donation information either on here or
dillonmontana@yahoo.com
Windows for now but i am working on a Mac port for the program !
A Simple asset maker working off a grid from a loaded png .
( Free ) Beta v1
User friendly super easy tile art maker / collision adder for pygame ( can export png for other games, Ui design and much more...)
*
**please do not copy and resell as your own this is free to use but not steal or copy.
if you use this app you own all exported art created with this and have right to distribute it any way you wish .**
I am still fairly new to coding this is my 2nd official project :)
This tool was made so I can simply have one tool to edit and create tile maps quickly.
**What Easy Tile 2D does:
**
*Warning*
If you have placed tiles in grid and then reslice the loaded tile sheet it will reset the layers and pallet to the new slicing..
i am working on future fix for this in next update..**
_load a PNG tilesheet_
(When using mutiple slices from same sheet make a copy of the png and load then in seperate for seperate slicing.
It will auto slice to your selected W/H & X/Y,
Click both bottons after custom drag to adjust automatically after you select the tile you want to use for slicing/grid.,
Then click slice to create pallet.)
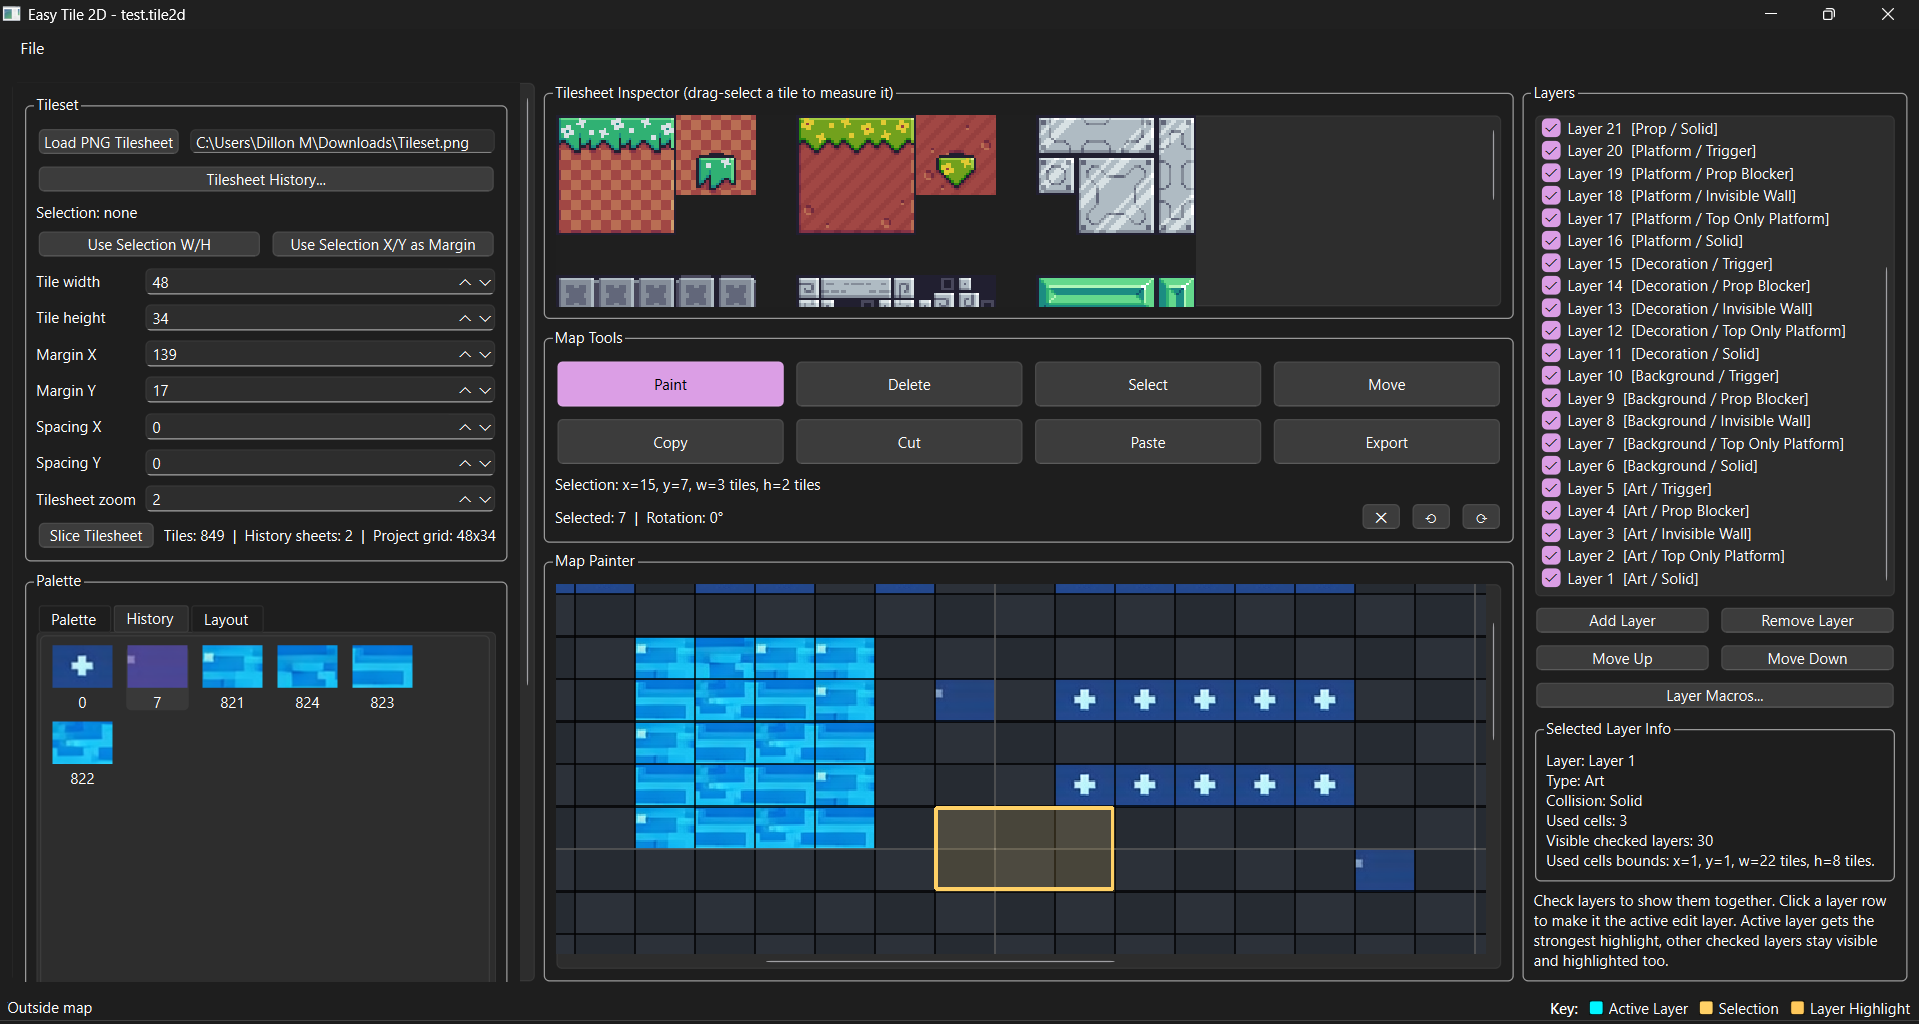
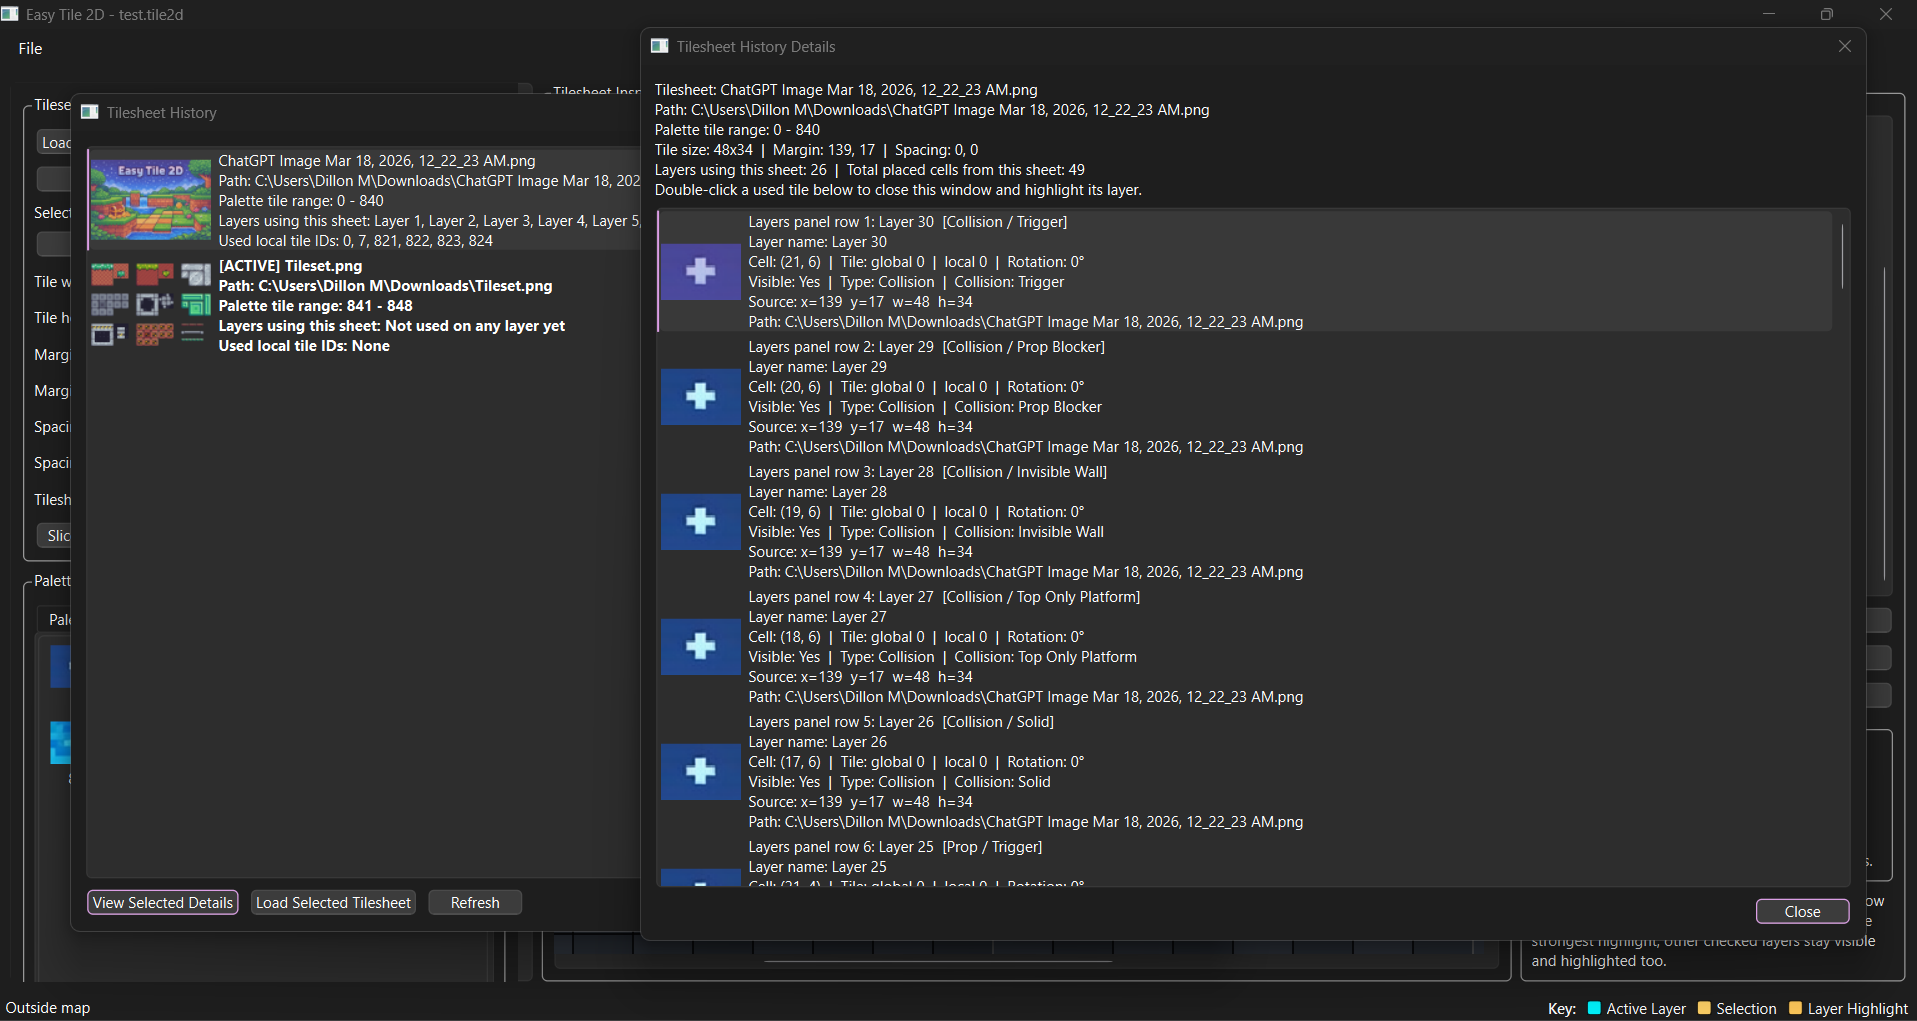
**This is where the history tab comes into play to see and organize what you have done.**
Slice tiles into paintable tile IDs, mutiple png required of same tile set to get different slices of the same png.
-Build maps with multiple layers
-Assign collision by layer
-Export PNG previews
-Export Python-ready map data
-Test map collision and layout in live test mode
**
This tool was designed to make tile map and UI layout creation easier, faster, and more beginner friendly.
i made this program so it would export png as well as the python code to make and link assets up to easier in python.
also an easy way to generate png for new marketable assets.
Please leave comments for any recommendations or simply how you hate or love the program...
Keep on the look out for new updates here Official Easy Tile 2d Page
Best for:
----------
platformer maps
top-down maps
UI layouts made from tiles
collision setup by layer
exporting visual previews for assets
generating Python tile map data for game projects
====================================================================
**
Tips & How to use:
**Moving Placed Tiles:**
*When selecting to move keep in mind you will have to select what you want to move only, then move it .*_
** Project Save / Load**
**-Save Project stores your current editor setup
-Load Project restores your saved map, layers, and settings
-Save Project As lets you keep different versions of your work**
Example meanings:**
**Collision Seclection Explained:**
Important: collision is assigned at the layer level, not per individual tile.
- solid
blocks from all sides
- top_only_platform
player lands on top only
- invisible_wall
blocks movement but may have no visible gameplay art purpose
- prop_blocker
blocks player like a solid prop/object
- trigger
used for overlap events, usually not full blocking collision
______
**Layer Selection Explained:
Important: Layer types help organize what each layer is meant for.
They do not change individual painted tiles by themselves — they define the purpose of that whole layer.**
- Background layer for scenery
- Art layer for visible gameplay tiles
- Platform layer for standable surfaces
- Collision layer for invisible blockers or trigger zones
- Prop layer for set dressing or blockers
- Decoration layer for visual detail only
Prop layer for objects, blockers, or set dressing
_______
**Layer Panel Explained**
-Clicking a layer makes it the active edit layer
-Checked layers stay visible together
-The active layer gets the strongest highlight
-Other checked layers remain visible but lighter
-Right-click a layer to change layer type or collision
-Use Move Up / Move Down to change draw order
_______
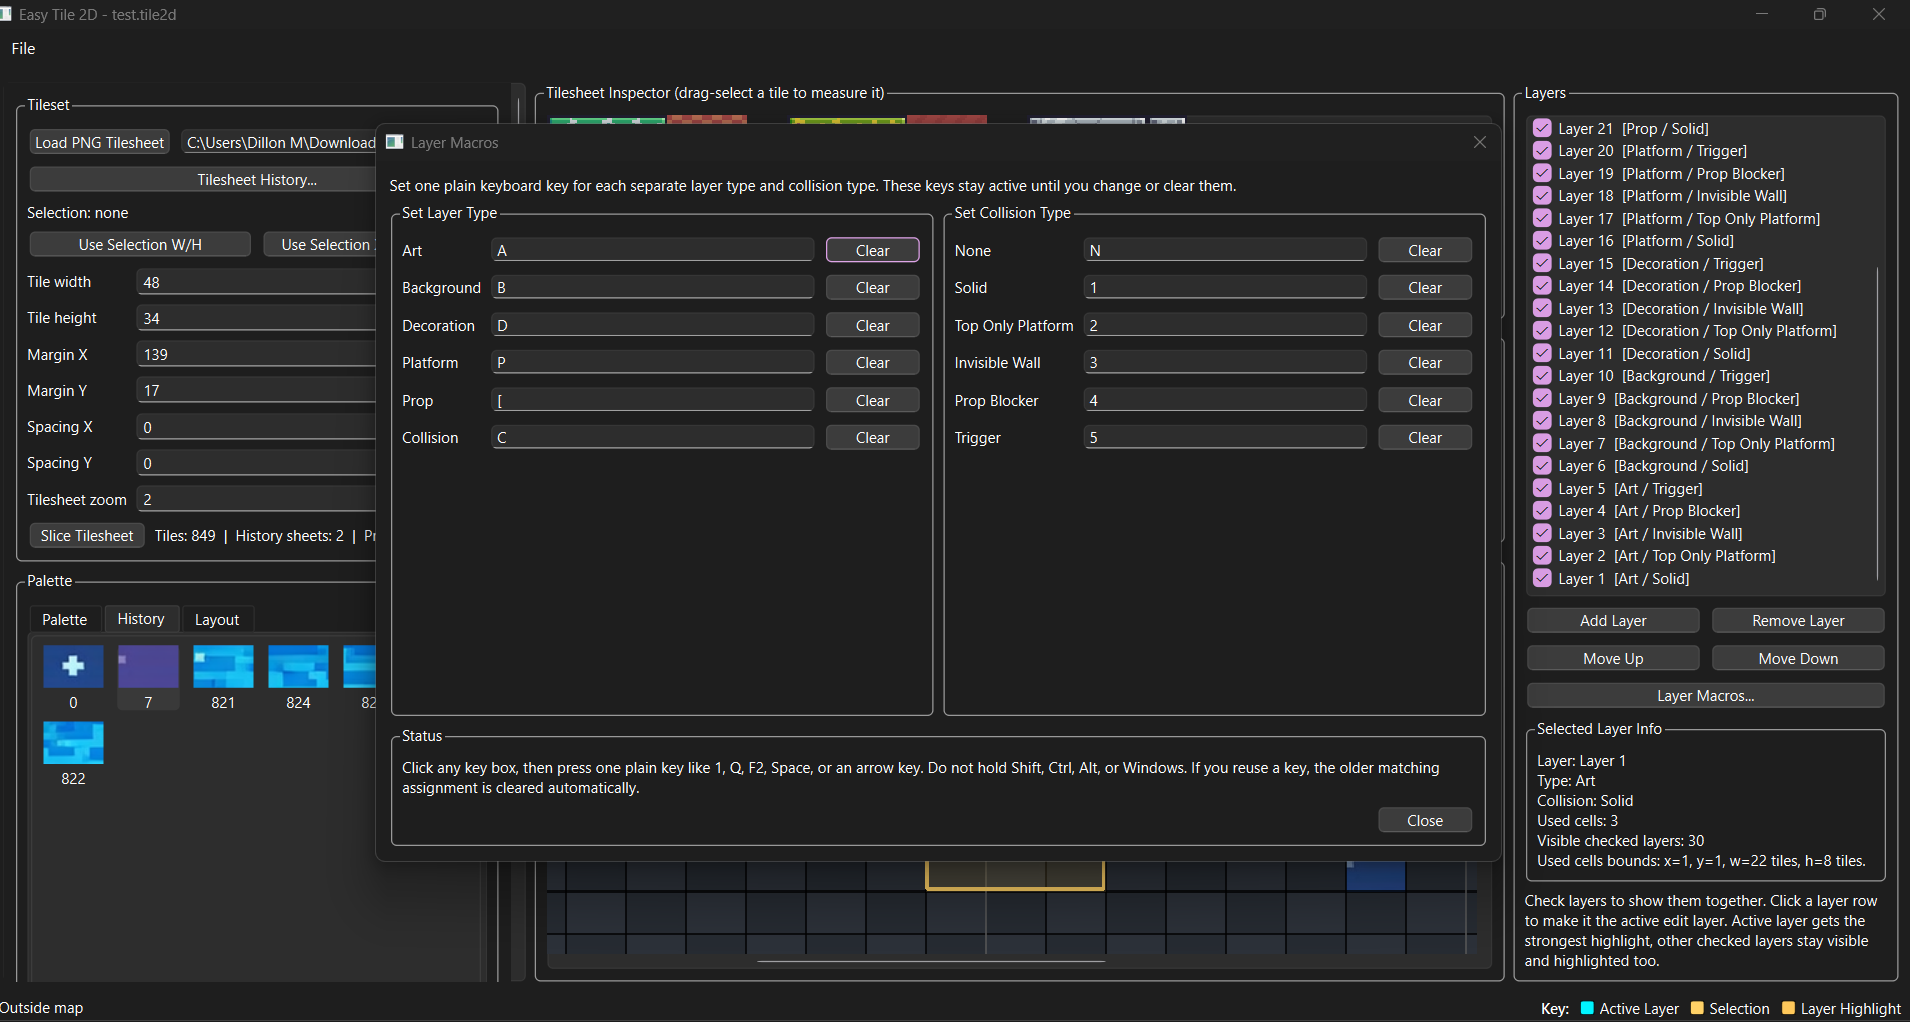
**Layer Macros Explained**
-Layer Macros let you assign keyboard hotkeys to layer type options
-They also let you assign hotkeys to collision options
-This makes it faster to switch a selected layer’s behavior without always right-clicking
-Macro keys are best used when organizing layers quickly
-Macro settings are saved for reuse
-----
==================================================
**GOOD SETUP RULE**
==================================================
**One behavior = one layer
If tiles need different gameplay behavior:
MAKE A NEW LAYER**
=================
_Easy Tile 2D - How To Use_
==================================
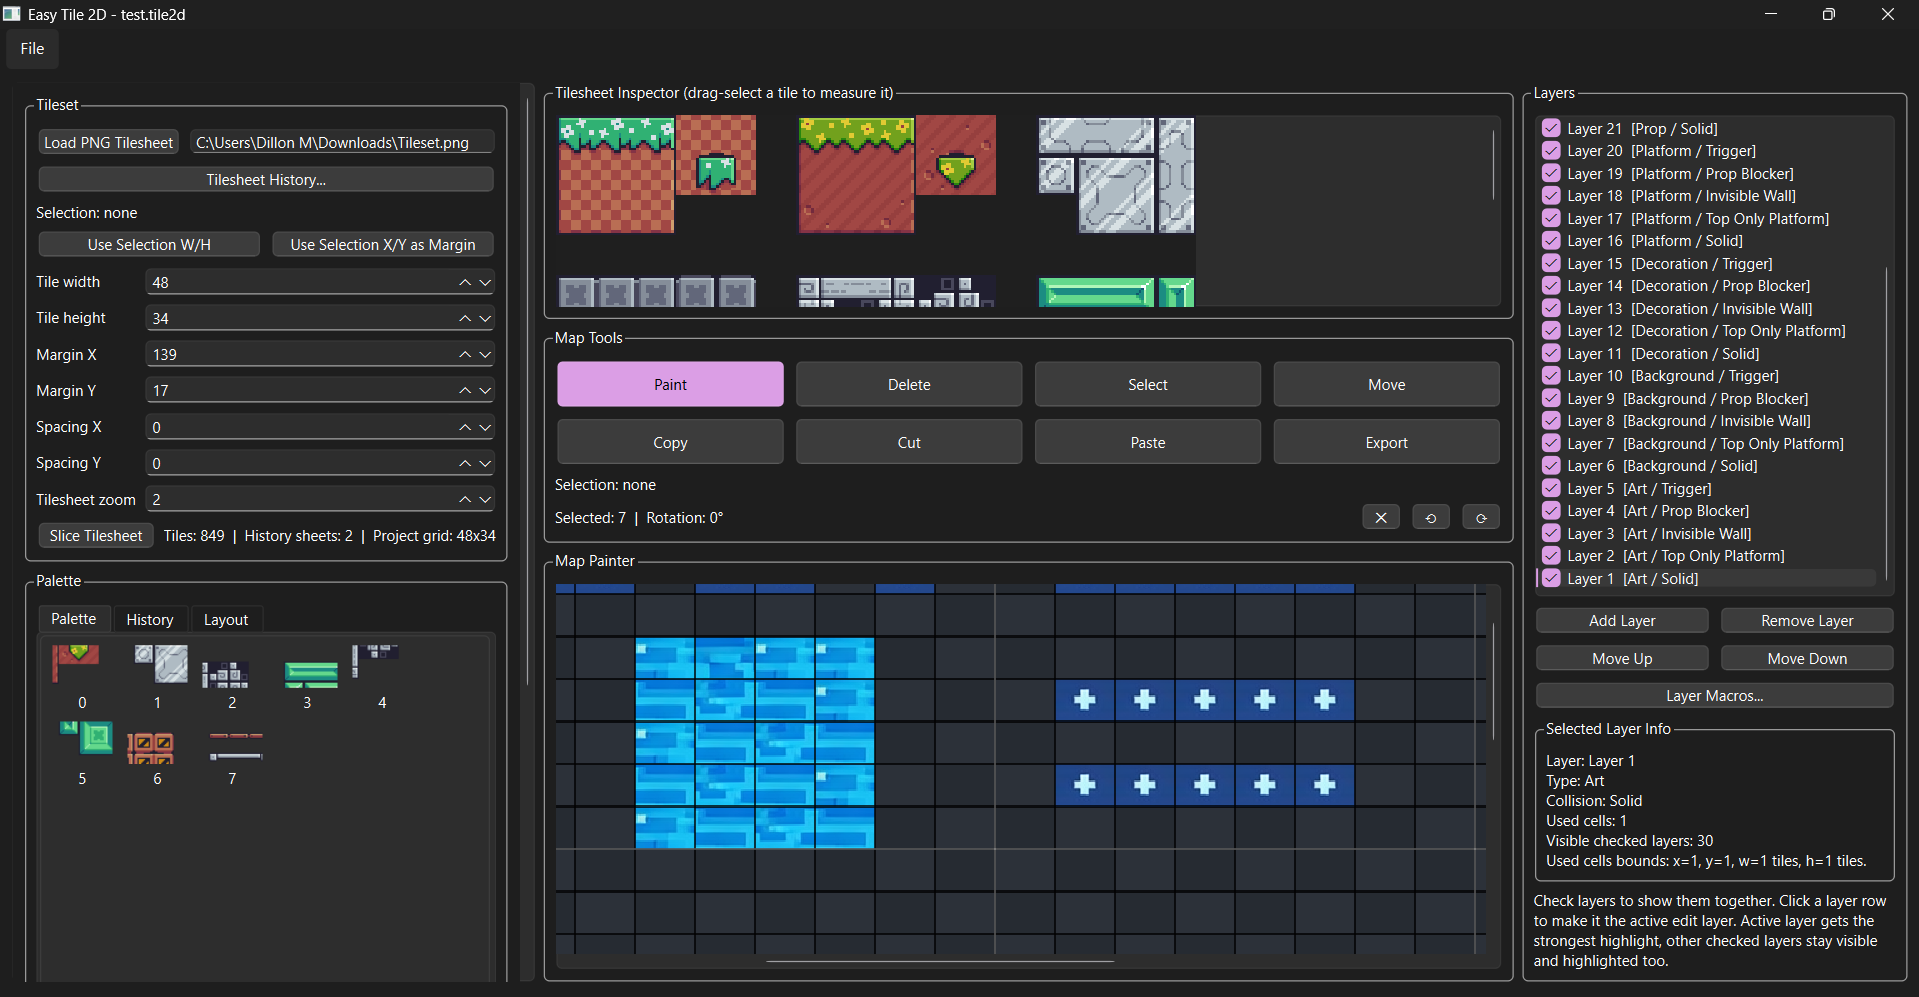
**1. Getting started**
------------------
A. Launch the program.
B. Click "Load PNG Tilesheet".
C. Choose your tilesheet image.
D. In the Tilesheet Inspector, drag over one tile.
E. Click:
- "Use Selection W/H" to set tile width and height.
- "Use Selection X/Y as Margin" if the first tile starts after blank padding.
F. Enter spacing if your sheet has gaps between tiles.
G. Click "Slice Tilesheet".
**2. Palette**
----------
A- After slicing, every tile appears in the Palette panel.
B- Click any tile to make it the current paint tile.
C- The status bar shows the tile ID and its source position from the tilesheet.
**3. Map setup**
------------
A- Set Columns and Rows for the map grid.
B- Set Zoom % for the map canvas.
C- Click "Create / Resize Map" to apply the size.
D- Use "Clear Map" to wipe all layers.
--------
**4. Tools**
--------
**_Paint_**
- Best for placing tiles quickly with left click drag
- Right click while in Paint to erase.
_**Delete**_
- Left click SINGLE TILE or click drag to erase tiles.
_**Select**_
- Drag to create a selection rectangle.
- You can also hold Ctrl and drag for selection while in other workflows.
_**Move**_
- best for repositioning existing tile chunks
- Select an area first.
- Switch to Move ( or use crtl
- Drag the selection to a new location.
_**Copy / Cut / Paste**_
- Select an area.
- Click Copy or Cut.
- Click Paste, then click on the map to place the copied block.
**5. Layers**
---------
- Click Add Layer to create a new layer.
- Click Remove Layer to delete the active layer.
- Use Move Up / Move Down to reorder layers (scroll using scroll wheel or bar to find wanted layer).
- Click a layer row to make it the active edit layer. Also will highlight layer to work on.
- Use the checkbox beside a layer to show or hide it.
- Multiple checked layers can stay visible together.
- The active layer gets the strongest highlight.(blue)
- Other visible checked layers remain visible and lightly highlighted.(yellow/gold)
**6. Layer right-click options**
----------------------------
Right click a layer to assign:
_- Layer Type:
- art
- background
- decoration
- platform
- prop
- collision
- Collision Type:
- none
- solid
- top_only_platform
- invisible_wall
- prop_blocker
- trigger_
**Important behavior**
------------------
**Collision is stored at the layer level.
That means any painted tile on that layer inherits that layer's collision meaning in the export.
========================
**Suggested workflow****
------------------
_
- Background layer for scenery
- Art layer for visible gameplay tiles
- Platform layer for standable surfaces
- Collision layer for invisible blockers or trigger zones
- Prop layer for set dressing or blockers_
==========================
**7. Grid viewing behavior**
------------------------
_- Checked layers can be viewed together.
- Clicking a layer makes it the active layer for editing.
- Only actually placed tiles are highlighted.
- Empty layers do not highlight random cells.
*When selecting to movie keep in mind you will have to select what you want to move only, then move it .*_
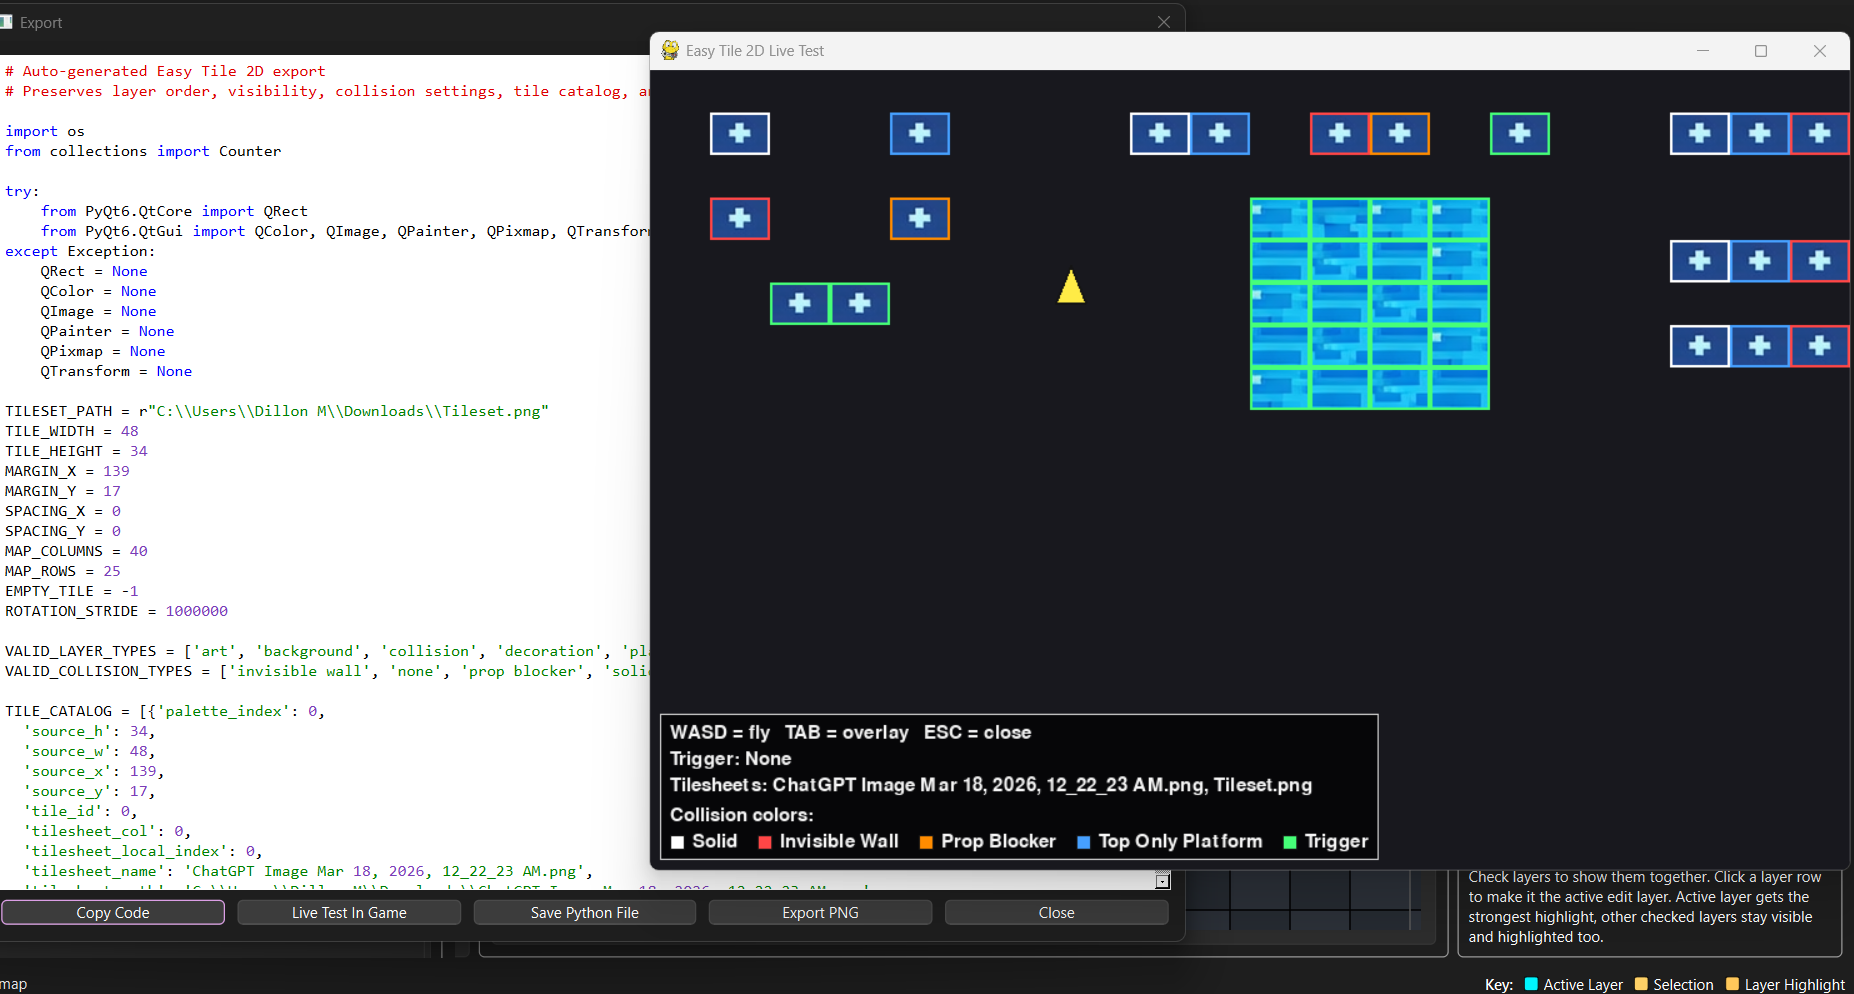
**8. Export options**
-----------------
**_Click Export to open the export popup._**
_From there you can:
- Copy Code
- Test Code and collsions in game with pop out player.
(make sure you close after your test)
- Save Python File
- Export PNG
==================================
**9. What the Python export code contains**
----------------------------------
The exported Python file includes:
- TILESET_PATH pointing to your linked tilesheet
- TILESET_DIR for convenience
- tile dimensions, margins, and spacing
- TILE_CATALOG with source cut positions for each tile ID
- LAYERS_DATA with:
- name
- visible
- layer_type
- collision
- data grid
- helper functions:
- slice_tileset()
- tile_id_to_source()
- build_map_pixmap()
- draw_map()
- get_collision_tiles()
- get_collision_rects()
_These are building blocks in **pygame**. They tell your game:_
_- where the tilesheet is
- what tile id points to what tilesheet position
- what layers exist
- what collision type each layer uses
- how to build the map visually
- how to get collision rectangles for gameplay
-Able to Copy to exsisting Pygames and export png for other ame creation worstations._
==========================
**10. Keyboard shortcuts**
--------------------------
**- _Mouse / view controls_**
_-Ctrl + Mouse Wheel on map = zoom map
-Ctrl + Mouse Wheel on tilesheet inspector = zoom inspector
-Middle Mouse Drag on map = pan view_
**- _Macro Keys Windows_**
_Keyboard Shortcuts(Built in)_
Ctrl+C — Copies the current selected tile area.
Ctrl+V — Enters paste mode so the copied tile area can be placed on the map.
Crtl+R - Selected / Highlighed tile will rotate right
Crtl+l - Selected / Highlighed tile will rotate left
Delete — Deletes/clears the current selected tile area.
ArrowUp — Moves the selected layer upward in the layer list.
ArrowDown — Moves the selected layer downward in the layer list.
_Save Features:_
Ctrl+O — Opens a saved project.
Ctrl+S — Saves the current project.
Ctrl+Shift+S — Saves the current project as a new file.
_All versions:_
Layer Macros / Custom Hotkeys
Easy Tile 2D also includes customizable Single Keystroke Layer Macros.
Ease of layer modification and grid worability :)
Click "Layer Macros..." in the Layers panel to assign your own plain keyboard keys to:
- Layer Type options
- Collision Type options
These macro keys are customizable and can be changed or cleared at any time.
Examples of valid plain keys include:
- 1
- Q
- F2
- Space
- Arrow keys
_Modifier combinations like Ctrl, Alt, Shift, or Windows-key combos are not used for these macro assignments.
If the same key is assigned twice, the older duplicate assignment is cleared automatically.
Macro bindings are saved so they can persist for reuse._
====
Test game mode:
when you export code it will auto spit out the collision and positions , you can test with a simple tester from the button to see your collisions highlighted and check if code is working
=====
==================================================
WHAT THE EXPORTED FILE IS NOT
==================================================
By itself, the export is NOT:
- a full pygame game
- a full player movement system
- a camera system
- a physics engine
- an enemy system
- a menu system
It is the map and map helpers only and a gui / menu maker.
=======================================================================
Easy Tile 2D exports map data, helper functions, and visual map output.
It is not a full game engine by itself.
=======================================================================
**EXAMPLES: (videos will come soon if wanted)**
==================================================
EXAMPLE 1 - NORMAL VISIBLE FLOOR / WALL SETUP
==================================================
Right-click Layer: Set Layer Type -> platform
Set Collision -> solid
Meaning:
- This layer is gameplay terrain
- Every painted tile on this layer is fully solid
- Player cannot pass through it
- Good for floors, walls, ledges, blocks
Example layer: Layer name: Ground Layer type: platform Collision: solid
Use this layer for:
- dirt floor
- stone floor
- cave walls
- solid blocks
- buildings player stands on
Result in game:
- tiles draw normally
- collision boxes are created
- player can stand on top
- player is blocked from left/right/below too
==================================================
EXAMPLE 2 - JUMP-THROUGH PLATFORM SETUP
==================================================
Right-click Layer: Set Layer Type -> platform
Set Collision -> top_only_platform
Meaning:
- This layer is still a platform layer
- But every painted tile only collides from the TOP
- Player can jump up through it
- Player lands on it from above
Example layer: Layer name: One Way Platforms Layer type: platform Collision: top_only_platform
Use this layer for:
- floating wooden platforms
- cloud platforms
- thin ledges
- bridge tops you jump onto
Result in game:
- tiles draw normally
- collision boxes are created
- player lands when falling from above
- player passes upward through the tile
==================================================
EXAMPLE 3 - PROP OBJECT THAT BLOCKS MOVEMENT
==================================================
Right-click Layer: Set Layer Type -> prop
Set Collision -> prop_blocker
Meaning:
- This layer is for objects
- Every painted tile on this layer blocks the player
- Best used for obstacle objects instead of terrain
Example layer: Layer name: Crates Layer type: prop Collision: prop_blocker
Use this layer for:
- crates
- barrels
- tables
- machines
- rocks
- furniture
Result in game:
- tiles draw normally
- collision boxes are created
- player cannot walk through object
- helps separate prop collision from terrain collision
==================================================
EXAMPLE 4 - INVISIBLE BOUNDARY WALL
==================================================
Right-click Layer: Set Layer Type -> collision
Set Collision -> invisible_wall
Meaning:
- This layer is for logic/blocking only
- It may have no visible art purpose
- Every painted tile blocks player movement
- Good for map limits and hidden blockers
Example layer: Layer name: Map Bounds Layer type: collision Collision: invisible_wall
Use this layer for:
- screen boundaries
- hidden blockers
- stop player leaving map
- invisible rails
Result in game:
- may or may not have visible art depending on your design
- collision boxes are created
- player is blocked
- best for invisible gameplay walls
==================================================
EXAMPLE 5 - TRIGGER ZONE
==================================================
Right-click Layer: Set Layer Type -> collision
Set Collision -> trigger
Meaning:
- This layer is for events
- Every painted tile on this layer becomes a trigger zone
- Usually does NOT block movement
- Used for scripted events
Example layer: Layer name: Level Exit Trigger Layer type: collision Collision: trigger
Use this layer for:
- checkpoint area
- cutscene start
- level exit
- damage zone
- item pickup zone
- message popup zone
Result in game:
- trigger rectangles are created
- player overlap can run code
- usually does not physically block player
==================================================
EXAMPLE 6 - PURE VISUAL BACKGROUND
==================================================
Right-click Layer: Set Layer Type -> background
Set Collision -> none
Meaning:
- This layer is visual only
- It draws art
- It does not affect gameplay collision
Example layer: Layer name: Sky Background Layer type: background Collision: none
Use this layer for:
- sky
- clouds
- distant mountains
- cave back wall
- decorative backdrop
Result in game:
- tiles draw normally
- no collision is created
==================================================
EXAMPLE 7 - DECORATION ONLY
==================================================
Right-click Layer: Set Layer Type -> decoration
Set Collision -> none
Meaning:
- This layer is for details only
- It should not block movement
Example layer: Layer name: Wall Decor Layer type: decoration Collision: none
Use this layer for:
- vines
- signs
- cracks
- trim
- torches
- small wall details
Result in game:
- tiles draw normally
- no collision is created
Please leave me feed back so i can improve this project !
Thank you !
Download
Click download now to get access to the following files:
Development log
- New Beta v1 out now for Windows!2 hours ago
Leave a comment
Log in with itch.io to leave a comment.